Bluntly BPDU–The Redux

Firstly, you should read this blog entry.  Go ahead, I’ll be here when you get back.

All done?  Good.  Now, for the first part of my response.  Mea culpa. I fracked up.

Based on this document: http://www.cisco.com/en/US/docs/switches/lan/catalyst6500/ios/12.1E/native/configuration/guide/stp_enha.html#wp1033403 I assumed an incomplete and incorrect stance on the way BPDUFiltering works.  This guide says that when a BPDU is received on a Portfast port, the port loses its Portfast state, which disables the BPDUFiltering and it begins acting like a regular STP port again.    However, thanks to Santino Rizzo for gently pointing out that BPDUFilter when enabled on an interface completely strips the BPDUs from being received and transmitted.  When enabled globally, it performs as I originally assumed, with the ports being transitioned out of Portfast and into regular STP ports.  I think the differences in my understanding come from the fact that the linked guide above is only for CatOS, which only allows BPDUFilter to be enabled globally.  The reference documents for interface-level BPDUFilter (like this one: http://www.cisco.com/en/US/docs/switches/lan/catalyst4000/7.4/configuration/guide/stp_enha.pdf) state correctly that it strips BPDUs from being transmitted at the interface level.  Okay, with that out of the way, on to the meat of my post…

When I started my CCIE walkabout 3 years ago, I had the good fortune to attend one of Narbik Kocharian’s boot camps.  One thing he told me there sticks with me to this day.  When we got into a discussion about the behavior of a certain protocol or configuration, he would always fire up a live router or switch to test our theories.  He told us, “IOS never lies.”  And he’s right.  IOS always does what you tell it to.  And it does it pretty much every time.  The same configuration gives you the same output.  So when we need to test something, we can jump into IOS and get out answer.  Because it will always tell us the truth.  That was my failing last night.  While I had been thinking of the discussion on Saturday, I didn’t take the time to lab it up.  So, I took my afternoon to do just that.

Let me state the parameters of my lab experiment.  I used two 3560 switches, one 24-port and one 8-port.  Both were running 12.2(25)SEE IOS, the 24-port was running the enhanced image, and the 8-port was running the base image.  I wiped the configuration of the two switches before starting and only configured a hostname on the 24-port switch.  The 24-port switch served as my test bed, and was the root of the spanning tree for VLAN 1, the only VLAN configured on the switches.  The only configuration done on the 8-port switch was to shutdown the connecting port between tests, and then re-enable it when I wanted to observe the output.  Otherwise all testing was done on the 24-port switch.  And now, I give you the results:

1.  No Configuration

I started out with a control of no configuration under the port at all.  This would give me a good baseline to work from.  I plugged the switches in and enabled the ports.  I then used the show spanning-tree interface fa 0/1 detail command to see the BPDUs.  Here’s the output from that test:


 Port 3 (FastEthernet0/1) of VLAN0001 is forwarding
   Port path cost 19, Port priority 128, Port Identifier 128.3.
   Designated root has priority 32769, address 0019.2f4d.4580
   Designated bridge has priority 32769, address 0019.2f4d.4580
   Designated port id is 128.3, designated path cost 0
   Timers: message age 0, forward delay 0, hold 0
   Number of transitions to forwarding state: 1
   Link type is point-to-point by default
   Bpdu filter is enabled internally
   BPDU: sent 44, received 1

Okay, so that’s what we expected.  BPDUs are being sent from the root bridge.  The switch has received one BPDU from its partner.  This is pretty much what happens straight out of the box.  now, let’s turn on Portfast.

2.  Portfast

I enabled access mode on the port with switchport mode access so that I could enable Portfast on the interface with spanning-tree portfast.  Afterwards, I enabled the port on the other switch and checked the output:


 Port 3 (FastEthernet0/1) of VLAN0001 is forwarding
   Port path cost 19, Port priority 128, Port Identifier 128.3.
   Designated root has priority 32769, address 0019.2f4d.4580
   Designated bridge has priority 32769, address 0019.2f4d.4580
   Designated port id is 128.3, designated path cost 0
   Timers: message age 0, forward delay 0, hold 0
   Number of transitions to forwarding state: 1
   The port is in the portfast mode
   Link type is point-to-point by default
   Bpdu filter is enabled internally
   BPDU: sent 20, received 1

Again, as expected.  The port is still sending BPDUs and receiving them.  The difference here is that the switch is now bypassing the blocking, listening, and learning phases and begins forwarding traffic immediately.  Bad thing if there is a loop behind it.  Okay, so the behavior is as expected so far.  Now, let’s start turning on the BPDU protection stuff.

3. BPDUGuard enabled per interface

For this test, I wanted to see what BPDUGuard does when enabled on the interface:


00:18:48: %SPANTREE-2-BLOCK_BPDUGUARD: Received BPDU on port FastEthernet0/1 with BPDU Guard enabled. Disabling port.

00:18:48: %PM-4-ERR_DISABLE: bpduguard error detected on Fa0/1, putting Fa0/1 in err-disable state

TestSwitch#sh spann int fa 0/1 det

no spanning tree info available for FastEthernet0/1

TestSwitch#sh int fa 0/1

FastEthernet0/1 is down, line protocol is down (err-disabled)

As soon as the switch received the BPDU from its partner, it slammed the door shut and placed the interface in err-disable.  No STP info because the port is essentially shutdown.

4.  BPDUFilter enabled per interface

After clearing the err-disable state, I removed the BPDUGuard configuration and ensured the port was no longer err-disabled.  I then enabled BPDUFilter on the interface with spanning-tree bpdufilter enable.  Here’s what I saw when I ran the spanning tree interface command:


 Port 3 (FastEthernet0/1) of VLAN0001 is forwarding
   Port path cost 19, Port priority 128, Port Identifier 128.3.
   Designated root has priority 32769, address 0019.2f4d.4580
   Designated bridge has priority 32769, address 0019.2f4d.4580
   Designated port id is 128.3, designated path cost 0
   Timers: message age 0, forward delay 0, hold 0
   Number of transitions to forwarding state: 1
   The port is in the portfast mode
   Link type is point-to-point by default
   Bpdu filter is enabled internally
   BPDU: sent 0, received 0

We now have STP information about the port, but no BPDUs being received or transmitted.  This is consistent with Santino’s description of the way BPDUFilter performs on an interface.  If you plugged a switch in now, it would see itself as the root bridge for each of it’s VLANs, as it isn’t seeing any BPDUs coming from its ports.  This would be the strange behavior I had seen with BPDUFilter when I had configured it in production earlier.  Makes sense to me now.  Let’s see how bad we can screw things up when we start combining things.

5.  BPDUGuard enabled globally, BPDUFilter enabled per interface

Setting the interfaces back to default, I then enabled BPDUGuard globally with spanning-tree portfast bpduguard default. I then enabled BPDUFilter on the interface with the previous command.  Here’s what I saw:


 Port 3 (FastEthernet0/1) of VLAN0001 is forwarding
   Port path cost 19, Port priority 128, Port Identifier 128.3.
   Designated root has priority 32769, address 0019.2f4d.4580
   Designated bridge has priority 32769, address 0019.2f4d.4580
   Designated port id is 128.3, designated path cost 0
   Timers: message age 0, forward delay 0, hold 0
   Number of transitions to forwarding state: 1
   The port is in the portfast mode
   Link type is point-to-point by default
   Bpdu guard is enabled by default
   Bpdu filter is enabled internally
   BPDU: sent 0, received 0

In this case, the inteface specific configuration overrrode the global config.  And the interface never received a BPDU to trigger the BPDUGuard function, so it remains in the forwarding state, albeit with no STP information on that port.  Let’s reverse it.

6.  BPDUFilter enabled globally, BPDUGuard enabled per interface

Back to default interfaces and removal of all global BPDU protection.  Now, I enable BPDUFilter with spanning-tree portfast bpdufilter default and enable BPDUGuard on the interface.  What do you think will happen?


TestSwitch#
00:27:59: %SPANTREE-2-BLOCK_BPDUGUARD: Received BPDU on port FastEthernet0/1 wit
h BPDU Guard enabled. Disabling port.
00:27:59: %PM-4-ERR_DISABLE: bpduguard error detected on Fa0/1, putting Fa0/1 in err-disable state
TestSwitch#sh spann int fa 0/1 det
no spanning tree info available for FastEthernet0/1

TestSwitch#sh int fa 0/1
FastEthernet0/1 is down, line protocol is down (err-disabled)

Just like expected.  The BPDU was received and the port shutdown before BPDUFilter could remove it.  As Santino explained above, BPDUFilter enabled globally evaluates the BPDUs on the Portfast ports and if one is received, the port would be transitioned out of Portfast and into a regular STP port.  Except in this case, where BPDUGuard does its job and disables the port before that can happen.  So far, so good.  Now for the big one.

7.  BPDUGuard and BPDUFilter enabled per interface

Back to default one more time.  Now, I enable BPDUGuard and BPDUFilter on the interface.  Once the config is done, I re-enable the port.  Here’s the payoff:


 Port 3 (FastEthernet0/1) of VLAN0001 is forwarding
   Port path cost 19, Port priority 128, Port Identifier 128.3.
   Designated root has priority 32769, address 0019.2f4d.4580
   Designated bridge has priority 32769, address 0019.2f4d.4580
   Designated port id is 128.3, designated path cost 0
   Timers: message age 0, forward delay 0, hold 0
   Number of transitions to forwarding state: 1
   The port is in the portfast mode
   Link type is point-to-point by default
   Bpdu guard is enabled
   Bpdu filter is enabled internally
   BPDU: sent 0, received 0

TestSwitch#sh run | beg 0/1
interface FastEthernet0/1
 switchport mode access
 spanning-tree portfast
 spanning-tree bpdufilter enable
 spanning-tree bpduguard enable

Ah ha!  It looks like BPDUFilter is stopping BPDUs from being transmitted or received on the port, as my new understanding of BPDUFilter explains.  Since there are no BPDUs, there is nothing to trigger the BPDUGuard feature!  Success!  As I said in the last post, when both are enabled on the same interface, BPDUFilter wins.  Yes, I admit I got confused about the function of BPDUFilter on the interface, but the results are the same.  I just have a better understanding of it now.

In conclusion, I learned a lot in the last 24 hours.  Always trust IOS.  It may not be clear all the time, but it never lies.  Make sure you lab it up when you have a question about things.  Listen to the commenters on your blog, they know their stuff.  And don’t be afraid to be blunt.  If nothing else, it makes you sure of your position.

Calm Before the Storm: BPDUGuard & BPDUFilter

A couple of days ago, a discussion erupted on Twitter  regarding the explanation and use cases for two of Cisco’s layer 2 edge protection technologies: BPDUGuard and BPDUFilter.  There were some interesting explanations and scenarios offered up, and I thought I’d give my take on it here as it will take a few more than 140 characters to lay out.

For those of you not familiar with BPDUs and why we need to guard and filter them, here’s the dime store tour of bridging 101.  The bridge is the most basic layer 2 device you can imagine.  It is designed to connect one network to another network.  The original bridge was designed by Radia Perlman while working at Digital Equipment Corp.  It was originally put in place to connect one of their customer’s LANs to another.  The story of the first bridge is outlined here: http://youtu.be/N-25NoCOnP4 and is highly recommended viewing for those not familiar with the origins of switching technology.  Radia was tasked with designing a method for bridges to detect loops in the network and avoid them at all costs, as a bridging loop would be catastrophic for data transmission.  She succeeded by creating a protocol that essentially form the network into a tree of nodes that prune links leading back to the root node.  In order to form this tree, each bridge sends out a special data packet called a Bridge Protocol Data Unit (BPDU).  This packet contains the information necessary for each bridge to build a path back to the root node/bridge and form a loop free path through the network.  If you’re interested in the exhausting detail of how BPDUs and spanning tree protocol (STP) work at a fundamental layer, check out the Wikipedia link.  You might say, “That’s great, but what does that have to do with my switches?” Well, if a bridge connects two networks together and segments their collision domains, think of a switch as the ultimate extension of that paradigm.  A switch is a device that bridges networks on every port, segmenting each port into its own collision domain.  Only, in today’s networks we don’t use hubs behind the bridge to connect end user devices, we use the switch as the user/system connection device.

So, now we know why switches send out BPDUs.  And now we hopefully know that BPDUs are very critical to the proper operation of a network.  So why on earth would we want to block or filter them?  Well, firstly any time that a new BPDU is seen on the network from a switch, it must send BPDUs toward the current root with the Topology Change Notification (TCN) flag enabled.  When the root bridge receives these BPDUs, it sets the TCN flag on its own BPDUs and forces the remaining nodes in the spanning tree to age out their topology tables.  The switches must then recalculate the spanning tree topology to ensure that the new switch has a path to the current root bridge or that the new switch IS the new root bridge.  This calculation can cause traffic to stop on your network for the duration of the calculation, which is 50 seconds by default.  So, when might the new switch become the new root bridge and cause chaos and despair in your network?  By default, bridges use a value known as the Bridge Priority to determine which one is the root.  A bridge with a lower priority is elected as the root bridge for that particular spanning tree instance.  Out of the box, the Bridge Priority value for most switches running regular 802.1d spanning tree is 32768.  So, assuming that all the bridge priorities in the network are the same, how do we break the tie?  The tie breaker is the MAC address of the bridge.  In most cases, this means the the device with the lowest MAC address is elected the root bridge.  And, in almost every case, the device with the lowest MAC address is the oldest bridge in your network.  So, if you pull an old switch out of the storage closet and plug it into the network, you’re going to cause a spanning tree election, and if you haven’t modified the Bridge Priority on your switches that old switch just might be elected the root bridge.  Which would cause your network to stop forwarding traffic for 50 critical seconds.  Those 50 seconds feel like an eternity to your users.  A word to the wise: ALWAYS set the bridge priority on the switch you want to be the root bridge.  Trust me, it’ll save you hours of pain in the future.

Users dislike a non-responsive network.  Immensely.  And under the default circumstances, when a user plugs a device into the switch, the switch does its job to determine if this device is sending BPDUs.  Which means the port has to do through the 50-second spanning tree process.  In most cases, this is not only unnecessary but annoying for the end user.  They don’t really care why what the switch is doing is so critical.  They just want to check their email.  How do we resolve this without breaking spanning tree?  Cisco decided to fix this with Portfast.  Portfast is a spanning tree enhancement that allows a network admin to say “This port is only going to ever have a PC plugged into it.  Please ignore the normal spanning tree process.”  What happens is that the port is immediately placed into the forwarding state, bypassing the learning and listening phases.  Spanning tree is not disabled on the port, but we also don’t take the time to listen for BPDUs or learn the information they contain.  This works great for end user nodes.  They get to check e-mail right away and you don’t get calls about the “slow network”.  And this works 90% of the time.  The other 10% is the stuff nightmares are made of.

Gertrude has one network port in her office.  She has a computer.  She bought a network printer and a new laptop.  She wants all three of these devices plugged into the network at the same time.  She buys a switch from a big box store so she can plug all these things in at the same time, not wanting to bother the IT department since they’ll either say ‘no’ or take a month to run a new cable to her office.  In her haste to get everything plugged in, she accidentally plugs one end of the network cable into the switch, and the other end into another port on the switch.  Then, she plugs her switch into the port on the wall.  And, if this port is Portfast-enabled, you’ve got yourself a Category 5 broadcast storm.  If you’re lucky enough to have never lived through one of these, count yourself fortunate.  Watch a spanning tree loop propagate through a network is like watching a firestorm.  Switch CPU’s spike to 100% load trying to process all the BPDUs flooding the network.  Users find themselves unable to get to the network, or in VoIP networks find themselves unable to use their phones.  Servers start going haywire and seeing themselves fighting for static IP address with…themselves.  And the only way for the IT department to fix the problem in most cases is to start unplugging switches until the culprit is found.  And heaven help Gertrude when they find her switch…

How could something like this happen?  Because Portfast assumes that the designated port is never going to have a switch connected to it, so it never bothers to listen for the BPDUs that would be a tell-tale sign of a loop.  It would never block the port initially while waiting for more information.  The Portfast switch gleefully starts forwarding packets and counting toward meltdown.  Portfast assumes that nothing bad could come from that port.  Anyone that works in IT knows that assumption is the mother of all frack-ups.  So, Cisco gave us two protocols to combat frack-ups, BPDUGuard and BPDUFilter.

BPDUGuard is a Portfast enhancement that functions as a fail-closed gatekeeper for the port.  As soon as a BPDU is detected on the port, BPDUGuard slams it shut and places the port into ‘err-disable’ mode.  Unless a recovery mode is configure (it isn’t by default), that port stay shutdown until the admins recover it.  In the above example, Gertrude plugs her switch in, and the switch detects a BPDU on a BPDUGuard-enabled port.  It gets disabled, and Gertrude can’t get on the network.  She calls into the IT helpdesk with her problem. The IT staff notice the port is err-disabled and investigate.  The IT staff go out to her office and find the switch before they re-enable the port.  After a stern talking-to, the network is saved and Gertrude gets her additional cable sometime next month.  BPDUGuard is the most-configured protection mechanism for this kind of issue.  Most IT admins want the port to shut off before the damage is done.  The problem with BPDUGuard is that if you aren’t the network admin, or if you aren’t in a position to turn the port back on quickly the user will experience an outage until the port is recovered.  If you’re a network admin that uses portfast, you should turn on BPDUGuard.  Don’t ask, just turn it on and save yourself even more hours of pain in the future.

BPDUFilter is a Portfast enhancement that functions as the fail-open moderator for the port.  Firstly, it prevents a switch from transmitting BPUDs on a Portfast enabled port (the switch still transmits BPDUs on Portfast ports).  If a BPDU is detected on the Portfast-enabled port, the Portfast state is removed and the port is forced to transition through the normal states of blocking, listening, and learning before it can begin forwarding.  In the above example, when Gertrude plugs her switch in, the uplink switch will detect the BPDU and force the device to transition through the regular spanning tree process.  It should also detect the loop and disable the highest-numbered port on the switch to disable the loop.  Gertrude will have to wait an additional minute before her port is up completely, but it will start forwarding.  The IT admins may never know what happened unless they notice Gertrude’s port is no longer in Portfast mode, or that a new switch is transmitting BPDUs from her switch port.  So why in the world would you use BPDUFilter?  In my experience, it is used when you are not the network admin for a given network and have no easy way to re-enable those ports that would be disabled by BPDUGuard.  Or, if the network policy for the particular network states that ports should begin forwarding immediately but that users should be able to connect devices without the port becoming disabled.  For the record, if you ever find a network policy that looks like this send it to me.  I’d really like to know who came up with it.  BPDUFilter is rarely used in my experience as a Portfast protection mechanism.

So, as these things usually happen, the question was asked during our discussion “What happens if you enable both BPDUGuard and BPDUFilter at the same time?” Well, I found a great blog post on the subject here: http://bit.ly/cKpBTd Essentially, if you enable BPDUFilter globally and enable BPDUGuard on a particular interface, the interface specific configuration takes precedence and shuts the port down before BPDUFilter can transition the port back to normal.  However, if you enable BPDUFilter using the interface-specific command and BPDUGuard using the interface-specific command, BPDUFilter will catch the BPDU first and transition the port to normal spanning tree mode before BPDUGuard can shut it down.  So, they each will perform their function while locking out the other.  The question becomes where each is configured (globally vs. interface-specific).  For those of you who might be in the unfortunate position to still be running CatOS, the only way to enable BPDUFilter is globally.  In this specific case, BPDUGuard will always win and the ports will be disabled.  You would only use BPDUFilter in this case to prevent ports from transmitting BPDUs.

My Take

Since best practice guidelines tell us that switch-to-switch connections should be trunk links, you should enable Portfast on all your user-facing ports to cut down on delay and trouble tickets.  But, if you have Portfast enabled, you better make sure to have BPDUGuard enabled at a minimum.  It will save your bacon one day.  The case for BPDUFilter is less compelling to me.  If you are in one of the few scenarios where BPDUFilter makes more sense than BPDUGuard, by all means use it.  It’s better than a poke in the eye with a sharp stick.  Personally, I’ve used BPDUFilter once or twice with mixed results.  My network started behaving quite strangely and some poorly-configured switches hanging off unidentified ports stopped responding until I removed the BPDUFilter configuration.  So I mainly stick to BPDUGuard now.  Better to have to re-enable a port after a user plugged in something they weren’t supposed to than to have to frantically unplug connections in the core in a vain effort to stem the raging broadcast storm.

EDIT

Be sure to check out my additional testing and findings over here.

Nerds on Film

I’m a visual learner.  I’ve known this for quite a while now.  While I can find a location with printed directions from Google or Mapquest, once I’ve been to a place and seen how to get there I won’t get lost again.  Network diagrams convey information much more clearly to me than spreadsheets.  Even the act of my watching the information being written on a whiteboard is enough visual stimulation for it to stick with me.  I think in pictures.  And, for the majority of my career this has served me well.

That is, until I started doing site walkthroughs.  Part of my job as a consultant requires me to walk around customer sites and observe things.  I need to figure out what kind of electrical power is available.  I need to know if the racks in the location will support a small UPS or a large rack-mount server.  I need to know how many patch panels are installed.  In short, I need to build a picture of your equipment and network so I can start figuring out what you need.  In the past, I’ve always taken notes in my handy notepad.  I jot down what I’m thinking at the time and what I’m seeing.  Which works great as long as I can provide some context.  Some notes, like “needs power” make sense if you remember to tag which rack you are talking about.  Or you can remember which order you went through if you forgot to provide locations.  Other notes, like “messy” or “I don’t want to ever come back here” tend to get lost in the shuffle.  And so I found myself looking at my notebook days after my walkthrough wondering exactly what I was thinking when I jotted down a particular entry.  That is, after I combed through the the 5 notebooks and legal pads I keep on my desk and in my car where notes may or may not be written down.  Even moving to an electronic device for taking notes didn’t alleviate all my note-taking challenges.  All that changed last year thanks in part to Cisco.

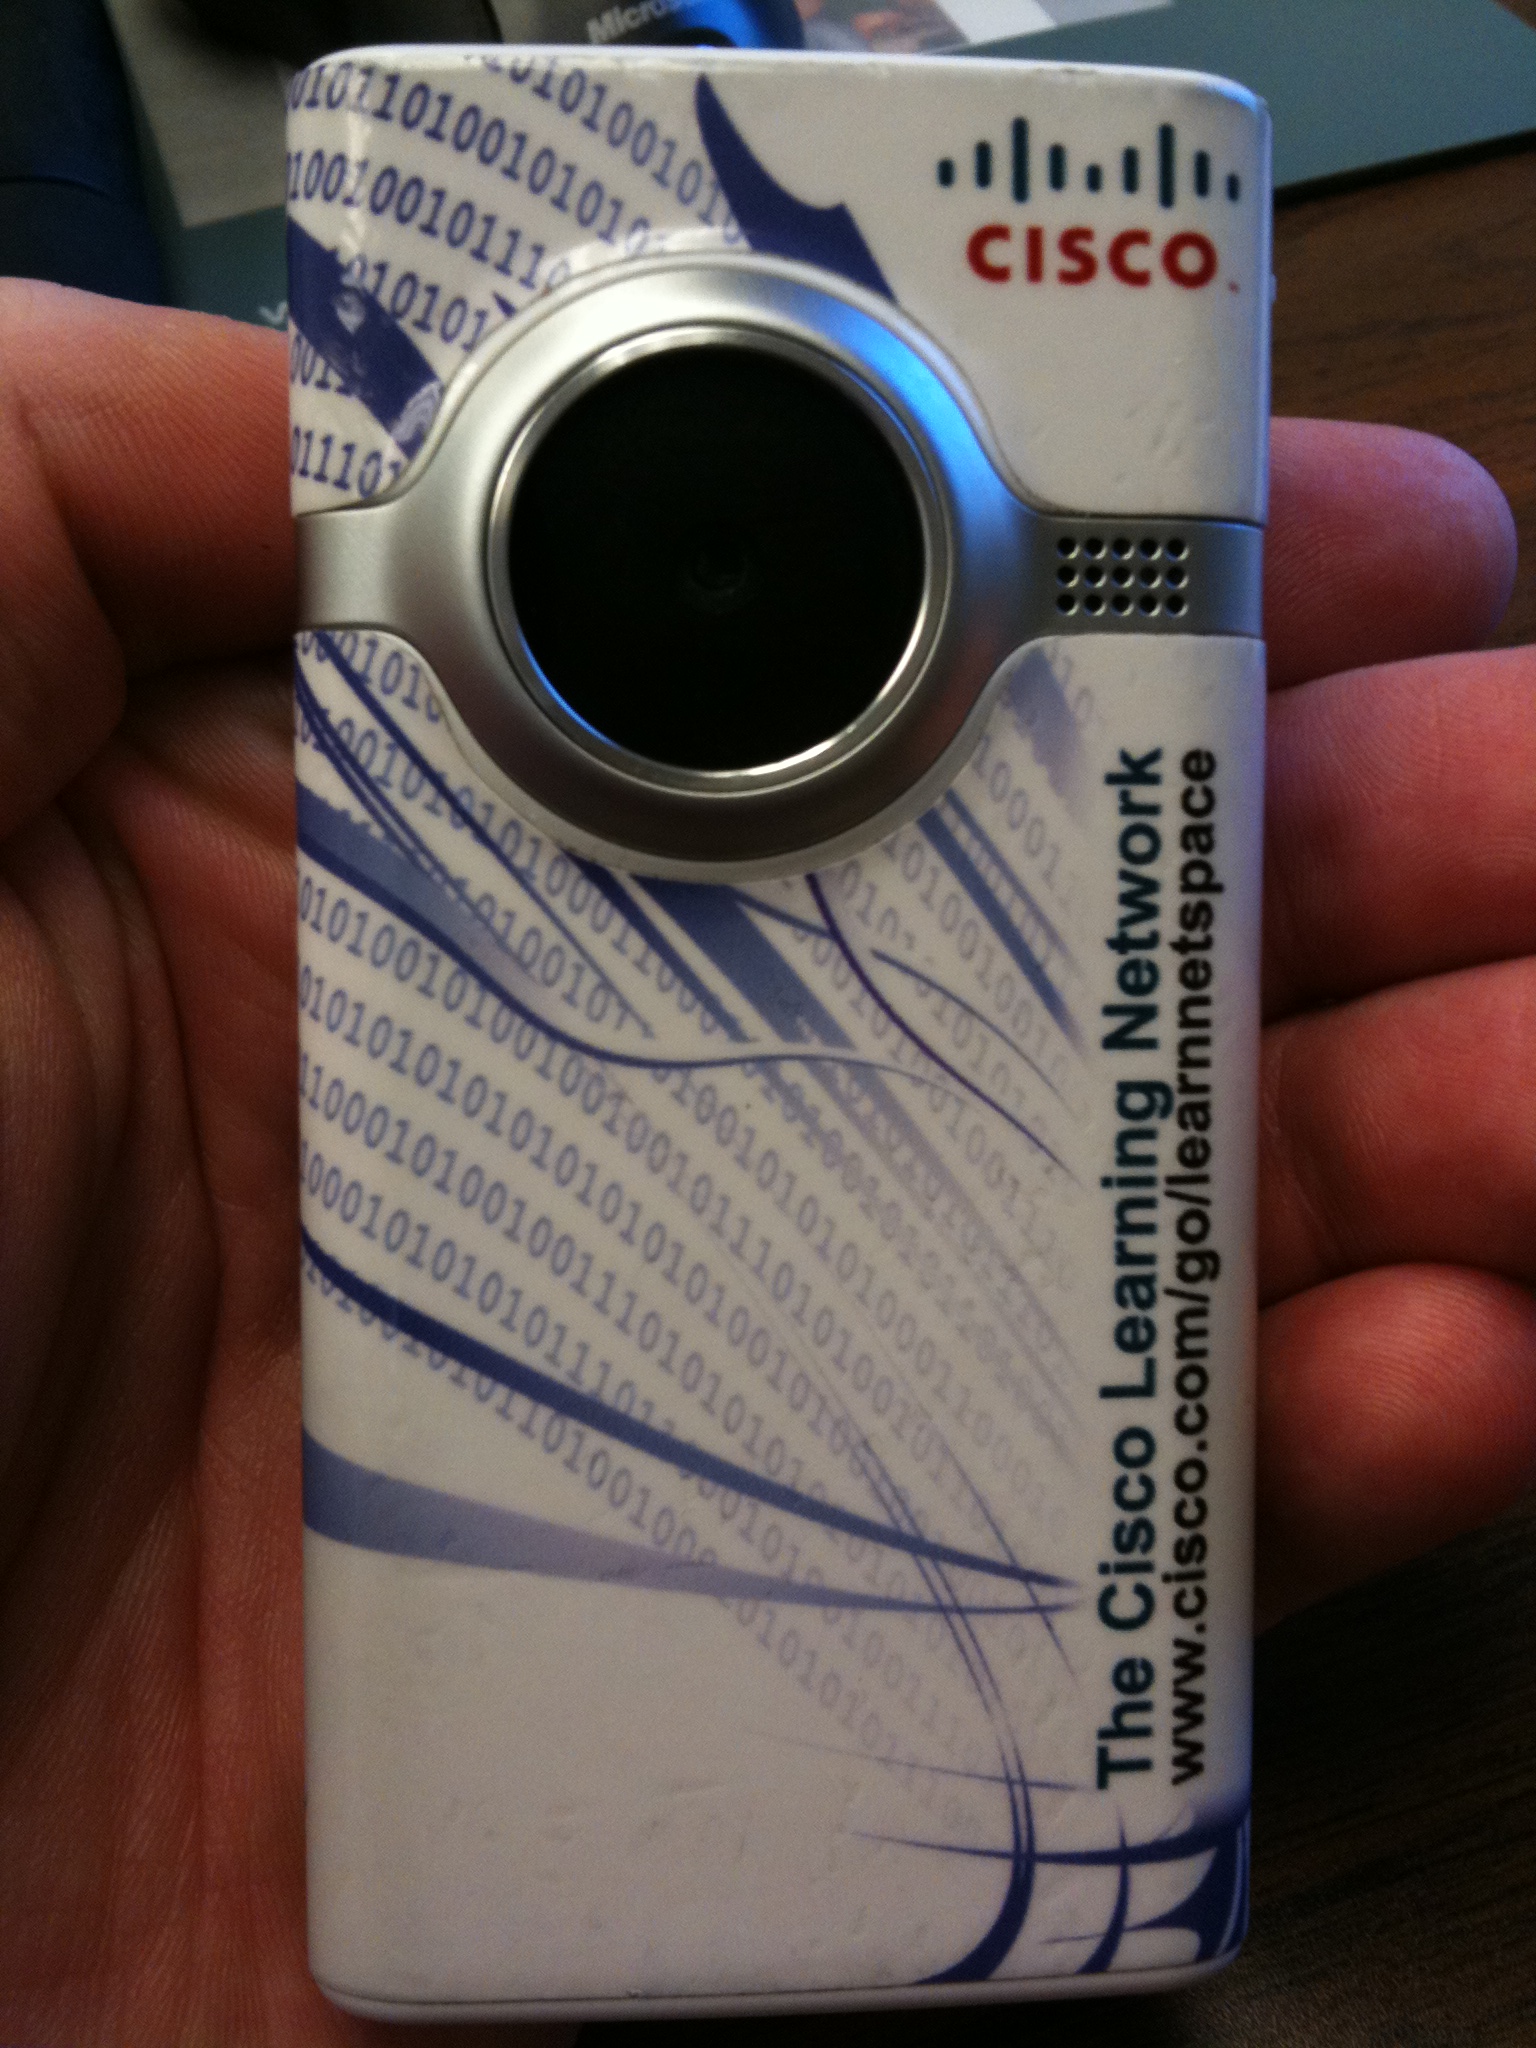
When I was at Cisco Live Networkers 2009 in San Francisco, I was fortunate enough to win one of these:

For those of you not familiar, this is the Flip Video camera that Cisco now offers after their purchase of Pure Digital in 2009.  This particular one was won by playing the Mind Share game at the Cisco Learning Lounge.  When I won it, I first thought “Great!” Then I realized that I never really take pictures of anything, let alone video.  When John Chambers was sitting on stage during the keynote talking about the revolution of video and how it was going to become a real game-changer, it didn’t really sink in.

Not until I was back home and working on the drudgery of my regular, non-nerdy non-convention life did the reality of video truly hit me.  All of the problems I had experienced with notes could be solved with video!  No longer did I have to remember to write down some key piece of information before it was forgotten.  No longer would I have to make several trips to a site to answer a question about port counts or rack types.  I could be free to conduct site surveys in a much more informal and meaningful manner.

Now, instead of flipping out my notebook or iPad or papyrus and quill, I take my Flip camera out of my backpack and just turn it on.  Then I talk.  I describe what I’m seeing.  I talk about rack types and punch downs.  I sweep the camera all around the area, noting anything of interest I might find.  And when I’m done with my video note, I save it to my computer for future reference.  In six months when an account manager asks me what kind of power is available in the room, I don’t have to make another trip to the site or spend half a day pouring over notebooks.  I simply fire up my video record of my walkthrough and give them the answer they’re looking for.

It also helps to jog my memory when I look at a map of the building or I’m asked about a specific closet.  I can go back and relive my time there to get the answers I need.  And others can watch my videos and see the same things I’ve seen.  That way, I can provide as much info as possible for as many people as I can in the shortest amount of time.  That, in essence is the power of video.  And for visual learners like me, it’s a really powerful way to demonstrate what I’ve seen to myself and to others.

And, thankfully, since I’m the producer I never have to be in front of the camera.  I let the visuals speak for themselves.  Because the last thing my customers and co-workers need to see is another nerd on film.

CUVA Windows 7 64-bit Support

If you are one of those people who jumped on board the video train with Cisco back in the day, you’ve probably got a Cisco Unified Video Advantage (CUVA) camera on your desk.  This device, which suspiciously resembles a Logitech 4000/5000 QuickCam (more on that later), was used back in the day in conjunction with 7900 series IP phones to provide the first video-enabled endpoint.  It was a little better than using the 7985 monstrosity, but was a little iffy sometimes to get it working properly.  I, for one, stashed my CUVA camera in a drawer and promptly forgot about it until I won a video-enabled 9971 at Cisco Live Las Vegas this year (Thanks again, Cisco Collaboration!).  I wanted to test how the video calls worked between endpoints in the office.  So I dug my CUVA camera out of the desk, video enabled a couple of phones, and set about installing the software so we could do cool Blade Runner-style video phone calls.  Except, most of the machines in the office are now running Windows 7 64-bit and the CUVA camera doesn’t work with that OS at all.  Cisco has never updated the drivers to support 64-bit, and based on the documentation has no plans to do it in the near future.  Woe is me…

So, after a few months of casual searching, I finally stumbled across a post on Cisco’s Community Support Forums that fixed me right up.  All credit goes to these guys for figuring out the solution, I’m just reposting it here in case anyone wants to try it for themselves.

1.  Download the latest version of the Logitech QuickCam software from here: http://www.logitech.com/en-us/435/243?WT.z_sp=Image.  I chose the Logitech QuickCam 5000, as that is all a CUVA camera is (just different branding).  Be sure in the drop-down box to select your operating system as Windows Vista 64-bit, as that is the highest 64-bit OS supported.

2.  After downloading the drivers, copy them to a non-Windows 7 device.  This could be a Windows XP system, Windows XP mode, Windows XP in a VM, or Windows XP running on a toaster in your kitchen that you have KVM and Remote Desktop access to.  The important thing is that you DON’T want to install it on Windows 7 or Vista.  We aren’t actually installing it, just getting the drivers.

3.  Start the installation program.  It should extract the drivers then fail due to incorrect OS type.  We don’t care.  Navigate to your temporary folder (Start -> Run -> %temp% -> Click OK) and find the folder that the installation program copied the files to.  It should be something like “QuickCam_<Version Number>”.  Copy this whole folder back to the Windows 7 machine from your XP system/VM/toaster.

4.  Navigate through the folder structure in the “\Drivers\x64\PRO464” folder.  Inside you’ll find a whole bunch of driver files.  Specifically, we want to edit the lPRO464v.inf file.  Open it in Notepad or the replacement text editor of your choice.

5.  Now, for the fun part.  We need to do a find-and-replace for the hardware ID in this text file.  I had the most luck searching for the string “08C5” and replacing it with “08C7”.  Depending on the age of your CUVA camera, you could also try searching for “08B2” and replacing it with “08B6”.  After the replacement option, save the file and exit.  What you are doing in this step is forcing the driver installation routine to identify your CUVA camera as a Logitech QuickCam 5000.  Because, that’s basically what it is.

6.  Plug in your CUVA camera.  It will successfully install all but one driver, leaving you with an unknown device in the Device Manager.  Go into the Device Manager, and update the driver.  When prompted to search for drivers or specify a location, choose to specify.  Point the installer at the location you just edited, which should be in <Location of QuickCam Folder>\\Drivers\x64\PRO464.  After you point the driver updater there, it should take right off and start working.  You’ll probably get a popup about the system not being able to verify the driver source.  This is because we changed the values in the INF file.  It’s a harmless warning in this case, so allow the driver installation to proceed.  After a few more seconds, you should have a brand spanking new Logitech QuickCam 5000 installed on your system.

There you go.  Hacking a CUVA camera back into the QuickCam 5000 it originally was in order to make it work with 64-bit drivers for a different OS that you are installing it on.  No one ever said voice would be easy.  But hey, you can get a little more mileage out of that camera.  At least while you work on your boss and convince him you need a 9971.  Or a personal Telepresence unit.  And if you figure out how to convince your boss on that last item, give me a call.  I’ve got someone you can go to work on for me.

License to Call: A Guide to Unified Communications Manager Licensing

For those of you out there that spend your time installing collaboration applications, or phones as the rest of the world knows them, all I have to do is mention the word “licensing” and you immediately have a Pavlovian reaction and start shaking uncontrollably.  Over the years, the process of obtaining the correct licensing for Cisco’s line of Communication Manager appliances has ranged from tolerable to outlawed by the Geneva Convention.  Today I hope to shed a little light on things.

In the Beginning

Not too long ago, Unified Communications Manager was known as CallManager.  And it ran on Windows.  Yes, let that sink in for a moment.  From the beginning, Selsius (The company that developed CallManager) developed the platform on Windows 2000 server.  When Cisco acquired it around version 3.0, they kept that OS choice intact.  They did harden it somewhat to keep it from getting easily hacked, but you still had Windows running under all your call processing tasks.  In those days, licenses were purchased when you purchased your phones.  The phones had part numbers like CP-7960-CH1.  When you purchased this part number, you also purchased a license to use this phone with CallManager.  You got a little Right To Use certificate in the box, which you promptly took out and put in a file folder somewhere.  Should Cisco ever come around and ask for your phone license, you went to that folder and pulled out the certificate and showed it to the person that asked.  And you were licensed.

Should your phone ever break, you could always order a replacement part, CP-7960=.  The equals sign meant it was a “spare” part.  What made it spare?  It didn’t ship with a license.  It was meant to replace a broken phone.  Consequently, it was also about $100 cheaper.  If a person was so inclined, they could order a whole bunch of spare phones and use them with CallManager.  How?  Because CallManager 3.x and 4.x had no mechanism for license enforcement.  Other than your conscience, there was nothing stopping you from saving $100 per phone and using the spare parts with no licenses.  And, I’m guessing a lot of people started doing this.  Which led to improvements in 5.x

DLUs, Nodes, and Features

When Cisco moved CallManager to version 5.x, they moved the OS to an “appliance OS”.  Okay, so it’s a highly customized verison of Red Hat Enterprise Linux with a totally different shell.  But at least it’s not Windows, right?  In doing so, Cisco also decided to make some changes to the licensing model.  First and foremost, they needed a way to be sure the licenses were bought and enforced when the phones were purchased.  Now, instead of buying the phones bundled with the licenses, you would buy the spare phones and buy a separate license.  Secondly, Cisco realized that charging a straight $100 fee for a phone license was inefficient.  The same $100 that powered a 7906 phone powered a 7985 video endpoint.  So, Cisco decided to ‘weight’ these devices.  Instead of buying a single license, you bought a Device License Unit (DLU).  These DLUs worked out to be about $25 each.  The 7906 above only counted as 3 DLUs, so it’s license cost was effectively $75.  The 7985 video phone was 8 DLUs, so its advanced features cost $200 to license.  The 794x and 796x phones that formed the bread-and-butter of phone handset sales counted as 4 DLUs, which worked out to be roughly equivalent to the original $100 license.

In addition, Cisco decided to start licensing the number of CallManagers that went into the cluster.  Previously, if you bought the software, you could load as many CallManagers into the cluster as you wanted (up to the limit of 5 per cluster).  Cisco decided that those additional servers now needed to be licensed as ‘nodes’.  So bringing a new subscriber node online in your cluster required an additional license.  I can remember when this change first hit the street.  There were entire classes devoted to figuring out the new licensing structure of CallManager.  Towns were pillaged.  Statues were toppled.  Human sacrifice, dogs and cats living together, mass hysteria.  It took some time for the old school voice…architects to get used to the idea of purchasing a block of DLUs for the phones they just ordered.  But it ended up working really well.  When a phone died, you removed it from CallManager and added its replacement in.  The DLUs the old phone consumed were freed for use with the new phone.  When you did an upgrade from 4.x to 5.x, you called TAC and provided them with the count of your old licenses.  You could also provide them with a list of the phones you had registered with the cluster.  And TAC issued you a DLU license that matched up to the number of DLUs you needed to run those phones.

The downside to DLUs is that it’s a hard count.  If you need 3 DLUs to add another phone, and you only have 2, you don’t get to add the phone.  Cisco gives you an ‘overdraft’ of a few DLUs just in case you need 1 or 2 more, but you also get a big warning telling you that you’re running on borrowed time and that you need to contact Cisco and get another few DLUs.

When version 6.x appeared, Cisco changed the name of the product to Unified Communcations Manager to better fit with the portfolio of communications as a whole solution.  They also did it to make my typing job harder and differentiate how long you’ve been working with voice by how many times you call the new product “CallManager”.  They also introduced a new license type, the ‘feature’ license.  To this day, I still don’t actually know what the feature license is really for.  I know that it prevents you from upgrading from 6.0 to 6.1 unless you have it.  I know you can’t start the CallManager service (yes it kept the name) without a valid feature license.  I know it has something to do with making sure you’re running the right version of the software. I also know that this one license has caused me more pain and consternation than any other license in the history of the world, save perhaps my driver’s license.

The ‘feature’ license is required when you upgrade from any major version.  Going from 5.x to 6.x?  Feature License.  Going from 6.0 to 6.1?  Feature license.  When you upgrade from 5.x to 6.x, you can move your DLUs and node licenses, but when you boot the system for the first time, the number of DLUs on the system are negative.  Wha?  Yes, in an effort to make sure you call TAC during an upgrade, any 5.x to 6.x migration will take the number of DLUs you have (say, 250) and give you the exact number as a negative after the migration (as in, -250).  At this point, your system runs, but you can’t add anything to it.  Why?  Because if you remove a phone, you decrement the number of licenses used, but it’s still negative.  So you can’t add a phone when you have negative licenses.  How to fix this?  You need a feature license.  As soon as you add it, bang!  All the numbers go back into the black.

This feature license stuff annoys me to no end, but I guess it needs to be there to keep people from upgrading to software they have no right to run.  But, occasionally, it comes back to bite you in the ass.  CallManager 6.0 was plagued with a bug that caused it to lock up after 180 days of uptime.  The fix?  Upgrade to version 6.1.  But, if you do this without getting a new feature license, your CallManager service won’t start and your phones won’t register.  And, should this ever happen to you, you get to spend 2-3 days bouncing back and forth between licensing and TAC, explaining your problem.  And pulling out what hair you have left on your head.

DLU-based licensing had finally started to work and be understood.  So, when Cisco released version 8 of Unifed Communications Manager, naturally it was time to change things again.  I give you…UCL

I Feel Like Such A User

Cisco has a ton of applications to support collaboration.  Unity, Unity Connection, Presence, Mobility, Contact Center, MeetingPlace, Webex, and so on.  And every one of them is licensed.  Keeping all the licensing straight is enough to employ an army of well trained bean counters.  So, in an effort to spur collaboration application adoption, Cisco came up with a program called Cisco Unified Workspace Licensing (CUWL, pronounced “cool”).  CUWL licensing said that for any given user in your enterprise, you could pay a fee and license certain applications.  For instance, if you wanted the basic CUWL user, you could pay your money and get an endpoint (phone) license, a voicemail license, and a mobility license.  When you purchased those licenses, Cisco shipped you a certain number of DLUs to cover the handset and the mobility, as well as shipping you a voicemail license for the platform of your choice (Unity or Unity Connection).

So, in version 8.x of Unified Communications Manager, Cisco extended this idea to the basic licensing of the platform itself.  Now, instead of buying a set of DLUs for a phone, you purchase a ‘user license’ to connect that user (User Connect Licensing, or UCL).  Except that right now, it functions just like CUWL.  When you buy 1 UCL license, Cisco still ships you DLUs to put into the system.  I guess its still a holdover from the old system.  But, by version 9, UCL will be the only licensing method available.  So you’ll be stuck counting users instead of handsets.

I suppose UCL works best from the standpoint that most users anymore don’t rely on one single communcations device to do all their talking.  Myself, I use a desk phone, my cell phone running Cisco Mobility Client, as well as Cisco Unified Presence Client.  I have many different ways to talk to you, but not all of them involve one device.  And so by licensing the user for any device they want to use, it gives you some flexibility in the method you use to communicate.  And, in a curious case of remembering the past, you can now order a phone part number, CP-7965-CH1, that includes a user connect license.  For $200, roughly.

I hope that this post clears up some of the intricacies of licensing in CallManager/Unified Communications Manager.  It’s not hard to grasp when you work with it every day, but when you first encounter it it can be daunting.  Just like learning how to drive, the key is practice and exposure.  Learn how each license type functions and what its relationship is to the others.  Don’t be shy about contacting TAC or licensing@cisco.com to sort out any issues you might have.  And don’t forget to buckle up.  Because it may be a bumpy ride.

Proctor! or, My Day as the Evil Guy that Stares

This weekend, I had the unique opportunity to proctor an exam.  Now, for the sake of security and keeping my butt out of hot water, I won’t mention the exam or the organization that gave it.  But I think you’d know it if I mentioned it…

I was contacted via e-mail and informed that there was an opportunity.  I jumped at the chance, seeing as how I was usually the person on the other side of the test.  I figured that volunteering would give me some insight into the whole testing process that up until now I have not had exposure to.  When I got the affirmative response to my proctoring request, I busied myself scowling into the mirror and giving my best “I’m not allowed to answer that” growl.  Strangely enough, there wasn’t a whole lot of direction about what to do to prep myself for the examination.  I figured at the very least I’d get a quick reading list, or a group of topics to brush up on just in case.

Test day began early.  The candidates were told to report at 8:00, so I needed to be on site no later than 7:00.  When I arrived, I met the lead proctor as well as the other two people assisting me in my ‘testing police’ role.  We cracked open the shipped materials and began separating everything out.  Yes, for those of you not familiar with the way the world works, there are still some tests out there that are given with a booklet and a #2 pencil.  We made sure we had enough exam booklets plus extra, just in case.  We filled out all the requisite paperwork and arranged the room so as to maximize the separation of the candidates and our ability to rush down the aisle and dispense justice should we need to.

Just before the scheduled check-in time, I stepped out of the room to use the restroom.  In the hallway outside the room, I saw the assembled candidates sitting around in chairs with a very familiar look on their faces.  I recognized it from my (many) trips to Building C in San Jose.  The intensely focused concentration of a person going over every last question in their head, ready for anything.  People telling themselves silently that they are ready.  Those trying not to be nervous about what was coming in a few short minutes.  I remember the look, but this was my first time being the cause of it instead of sharing it with my fellow candidates.

At 8:00 registration opened.  We had to verify the candidate with a photo ID, a note from their 3rd grade teacher, and a DNA sample.  Okay, maybe just the photo ID.  Once identified, we escorted the candidate to their assigned seat.  It felt a little silly assigning them seats like this was middle school science class, but the rules said we had to.  Once we had checked in all the candidates, we started the whole process by reading the script.  Unlike the fine proctors at the CCIE lab, this exam required us to read from a prepared script.  In fact, there was a note at the beginning that cautioned us NOT to deviate or change words.  I remembered Proctor Raymond’s well-rehearsed speech from last month.  Not rehearsed because he was reading from prepared material, but instead because of the number of times he had given it.  It felt more organic, more connected.  But, as the script droned on, I stood beside the lead proctor and tried to look menacing.  Which probably came across as comical for the candidates.

Once all the administrativa was taken care of, we noted the time on a whiteboard as there was no clock in the room.  That was a little strange to me, as most every testing center I’ve ever been to has a clock situated just above eye level.  And so we were off.  And that’s when the fun really started:

1.  I was not allowed to clarify the questions.  At all. This was the strangest part to me.  I was familiar with the now-famous “help” the CCIE proctors provide.  Which, I will tell you, is light years better than the help I was allowed to provide.  No clarification of the question.  No word definitions.  No help of any kind whatsoever.  I know that I’ve bothered the proctors enough in my lab attempts with what were probably pedantic or pointless questions.  But to the proctor’s credit, they helped me each and every time as much as possible.  Clarification and opinion were helpful in allowing me to figure out the question.  For my own proctor experience?  My only answer was “Let me get the comment form.”  I was divorced from the process totally.  While I can understand why I wasn’t allowed to help (my total inability to confidently answer questions based on the exam’s content), it made me feel a little helpless.  Especially when a candidate asked me anyway.  I felt like a bit of a heel.  I was also not allowed to directly confront anyone that I thought might be cheating or disrupting the test.  Instead, I was to write down the time and the candidate that was being disruptive or suspicious and send it off with the test materials.  I felt more like a hall monitor than anything else.  Not allowed to do anything other that write down everything I saw and turn it in for someone else to worry about.

2.  Bathroom escort engineer. So what did I do with my time?  Take people to the bathroom.  In the CCIE lab, there is a visitor name badge especially for the lab.  When you need to relieve the pressure, you grab the name badge off the hook and step across the hall.  You need the badge to get back in the lab, and in this manner it limits the number of people that can be out of the room at any one time.  I usually that the opportunity to run down the hall and grab 12 more ounces of caffeinated sugary goodness.  In my proctor exam?  One person out at a time.  And I had to walk them to the bathroom.  Thankfully I didn’t need to actually go inside, but I wouldn’t put it past some people.  As I marched people back and forth between the facilities, the nervous chatter was quite humorous.  I know that I have a gift for pointless conversation, especially when I’m nervous or stressed.  And apparently so did a couple of the candidates.  I tried my best to keep up my calm demeanor and stone face, but I couldn’t help but feel for them.  I’m sure they were trying to engage any kind of support or stress relief they could.  I makes me realize now that the conversations that I have with the CCIE proctors at lunch are a godsend.

3.  Staring contests. So, what is a person to do when they can’t comment on exam items and only really exist to provide safe passage to the water closet?  You guess it: People Watching.  A hobby of mine in social settings became my companion for the hours that dragged on during the test.  I observed all manner of fun.  The thinker pose.  Quiet stretching after each exam section.  Confused and concerned looks toward the ceiling, as if the answers would mysteriously appear in the tiles.  It all became apparent to me as time wore on who was confident about their knowledge and ability in this test and who would probably be coming back for another try.  The people who jumped right up after finishing all the questions, not taking time to change any answers because they were confident in their choices the first time.  Contrast that to the people that were still furiously erasing with less than five minutes to go, studying the exam booklet as if it were the Rosetta Stone, attempting to glean a hint or clue as to the correct bubble to fill in for that particular line.

In the end, the exam ended with a whimper compared to the prep we did beforehand.  As soon as all exams were turned in, they were loaded into a container for shipping to whatever dark and draconian organization would decipher the arrangement of completely darkened #2 pencil marks and pronounce judgement for this candidate as to whether they would be allowed to title themselves with the styling allowed by their studies and trials.

Me?  I walked out with a new perspective on proctoring.  I’ll probably put my name in the hat the next time the opportunity arises.  I’ll spend less time scowling in the mirror in my imitation of what I thought a proctor should be like.  And I’ll bring a notepad to jot down all my ideas.  I’ll work on my stage whisper so heads don’t spin around when my voice starts carrying as I ask a fellow proctor about something.  And, I’ll try not to get caught staring.

I’d Like To Buy The World A $1400 Coke

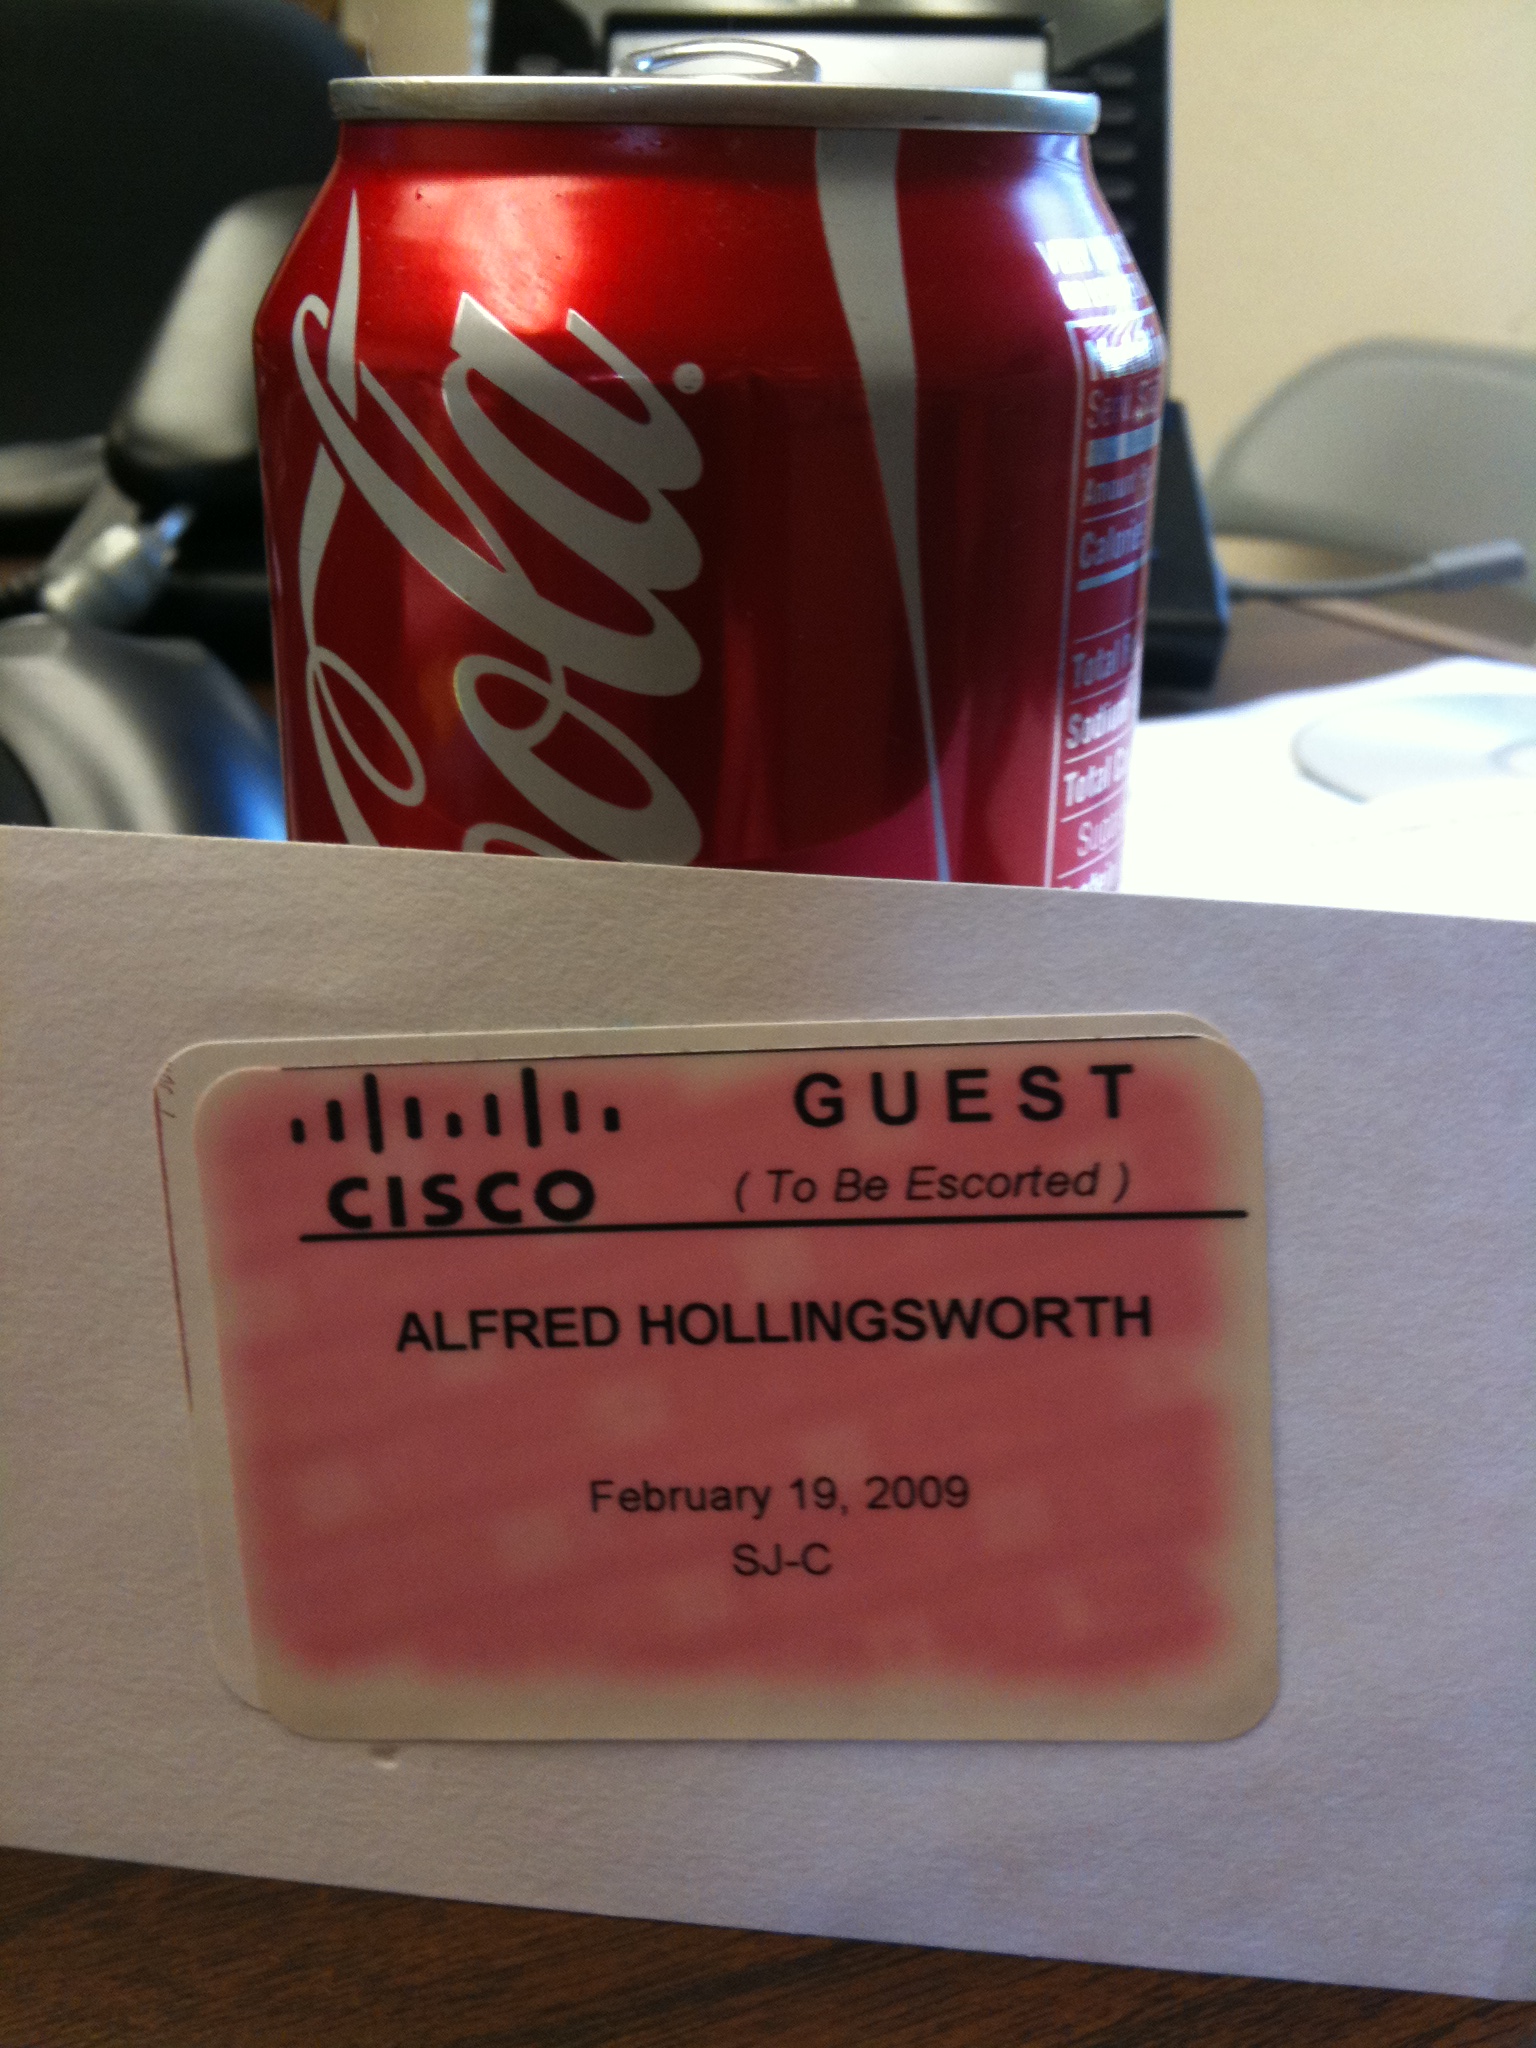
Because it seemed to make an impression with Greg Ferro, here’s the $1400 Coke Can:

This is actually the second lab attempt in San Jose.  The first was in RTP, but that can mysteriously disappeared before I got on the plane.  That was also a $1250 Coke can, this one is the first test after the price hike to $1400.

The joke, of course, is that I flew all the way to California, pulled my hair out for 8 hours, and all I have to show for my $1400 is a Coke can and a faded, pink name badge.  Some people refer to it as the “$1400 Cisco lunch”, but I figured this can would be a reminder to me every time I crack open a workbook to study or fire up my lab to test HSRP.  It’s something tangible that I can look at to remind me to keep studying and keep pushing on.  It’s also a relic in some regards because my last two trips have not yielded any name tags.  I guess they stopped identifying the lab candidates that way and just memorize your face while your staring at network topologies.  They also started charging for the drinks in the lab break room as a cost-cutting measure, so my next relic would probably be the $1400.65 Coke Can, which doesn’t really roll off the tongue.  If all goes well, though, my next trip will be the one that nets my number, a plaque, fame, fortune, women, power, and mountains of money that every CCIE is given in a wheelbarrow upon passing.

By the way, if you think it’s tough trying to go through a TSA checkpoint with a half-empty water bottle, try explaining to them why you want to carry on an empty soda can with a name tag stuck to the outside.  It’s hilarious!

Oh, and the “Alfred” part?  That’s a story in and of itself…

IPv4, My Old Comfy T-Shirt

I have a t-shirt in my closet that I’ve owned since my freshman year of college.  It’s a plain gray shirt, full of holes and practically threadbare.  It’s a size or two too small at this point, not quite having survived the assault waged by my increasing appetite and decreased physical activity.  It’s stained and faded.  It also happens to be the most comfortable shirt that I own despite all of the above statements.  No matter what, when I dig down to the bottom of the vendor t-shirt pile, it’s always there waiting for me.  And every time I see it, I can’t help but put it on and wear it around for the rest of the day.  Because it brings back good memories and it still feels good, small and worn-out though it may be.  And no matter how many times my wife tells me to throw it out or hides it in the back of the closet, I’ll still hold on to it for years to come.

And now you ask yourself, “What was the whole point of that tangent???”  Well, dear readers, IP version 4 is a lot like my old t-shirt.  It’s familiar.  It’s been around forever.  Yes, it’s full of holes and has some ugly dirtiness about it that we’d rather not have to deal with (**cough NAT cough**).  It’s too small, having been outgrown by the very Internet it helped to found.  Our appetites for devices and connectivity have outpaced our activity in keeping current with addresses to consume.  But, it’s still a comfortable old friend to look upon and experience nostalgia.  The first time you “got” subnetting.  The day you read RFC 1918.  The first time you accidentally configured a host with the broadcast address of a subnet.  The day you figured out what those Class E addresses were REALLY for (Shhh…it’s a secret to everybody.)  And it still works for the majority of the world at large.

IP version 6 isn’t just a pie-in-the-sky vision, it’s a cold hard reality of the world we live in.  We’re going to have to move, and we have to do it sooner rather than later.  Pretty soon, all my appliances are going to have IP addresses, and if my toaster can’t talk to the microwave, there’ll be hell to pay.  But in order to facilitate that kind of universal connectivity, we have to make some hard choices.  We have to go back and add on to the years of work we’ve done making our grand Internet.  And it scares the hell out of a lot of us.  Most network, um, rock stars can tell you their IP scheme off the top of their head.  They’ve spent time and effort and reams of paper documenting the management VLAN IPs and loopbacks.  And the thought of wrecking all that for the new, shiny protocol that still a little mysterious frightens and downright pisses them off.  Or, implementing IPv6 on top of all their hard work makes them upset they’re having to reinvent the wheel all over again.  And so, they dig down into the pile of t-shirts and find their old friend, IPv4.  They find ways of making it work for a few more months.  Carrier NAT, class A reallocation, class E allocation, call it what you want.  It’s like telling yourself that if you go to the gym that old t-shirt will fit again, only saying it while you’re eating Doritos.  We all know it’s time for IPv4 to go.  Yes, it will still be around for a long time to come so users can access the Internet.  Similar to good old DOS, it’ll be here in one form or another well past it’s useful life.  And much like my wife, everyone is saying that the old IPv4 has to go.  And much like I do when my wife tells me that, I nod my head in agreement and then promptly ignore her (Shhh…don’t tell her I said that).  Because as long as IPv4 is still around, we’ll still be able to remember the glory days.

So maybe in 2011, it’s time to really take a look at IPv6 and what it’s going to take to pull our networks into a new generation.  Finally enable dual-stack on our devices and stop consuming so many IP addresses.  Drive a stake through the heart of NAT and sweep it under the rug where it belongs.  But when I go through all of that, you can rest assured I’m going to be wearing my comfy old t-shirt.  That is, if my wife doesn’t find it first.

God Help Us, We’re In the Hands of Engineers

A comment over on Jeremy Stretch’s wonderful site touched off a bit of a discussion today about the proper use of the term ‘engineer’.  It appears that the “real” engineers in the world have gotten into a bit of a tiff with us computer nerds about why we aren’t allowed to call ourselves engineers.  A little background:

According to the font of all knowledge, an engineer is:

...a professional practitioner of engineering, concerned with applying scientific knowledge, mathematics and ingenuity to develop solutions for technical problems. Engineers design materials, structures, machines and systems while considering the limitations imposed by practicality, safety and cost. The word engineer is derived from the Latin root ingenium, meaning "cleverness".
Engineers are grounded in applied sciences and are distinguished from scientists who perform research and artists who create with a focus on aesthetics. The work of engineers forms the link between scientific discoveries and the applications that meet the needs of society.

(COPIED FROM HERE)

Hmm, okay.  So, that sounds like it could be a lot of things.

– applying scientific knowledge (check)

– Mathematic knowledge (check)

– Developing solutions and systems (check)

– Considering limitations of cost and practicality (double check)

Okay, so far it looks like myself and my brethren are engineers for sure.  Ah, but wait…here come the scientists:

According to multiple sources, the “real” engineer is distinguished by holding a 4-year Bachelor of Science degree in an engineering discipline, having 6 years experience, and taking one or more tests.  This appears to be the most common set of requirements (more on this later).  So, because I didn’t put down civil engineering as my major in college, I’m out.  Because I don’t have six or more years experience building sewers or roads or bridges, I’m disqualified.  And because I haven’t forked over $1000 or more to the state licensing board, I’m just a lowly technician worthy of engineer nerd scorn.

What I have done, though, is spend my career building complex systems relying on specific scientific and mathematic principles.  Knowledge that not everyone who’s ever hit the power button on their laptop has.  I make the magical packets flow so you can watch Youtube videos and download dirty pictures.  I make your e-mail work so you can get blueprints and site updates.  I keep the QoS flowing so your emergency need to check Google Earth to make sure no one built a subdivision in the way of your highway.  I do things with my knowedge that would make you cringe and look the other way because you don’t understand them.

I took industry-specific tests from Novell, Microsoft, Cisco, HP, and Symantec to prove my knowledge.  Those governing bodies granted me the right to use the titles MCNE, MCSE, ASE, and SCSE (all have the word ‘engineer’).  And, for the record, these are the same tests no matter if you take them in Texas or Thailand.  I know of engineers that took their tests in other states because they were ‘easier’ and used comity to be licensed in their home state. So, in a sense, I am an engineer for all those reasons.  Yet, the professional engineers (P. Eng) get all huffy about it.  For the record, I thought P. Eng was Sean Combs’ name this week…

In the US, you are a P. Eng if you take the classes and tests and have enough experience and get signed off upon by other engineers.  But you can still use the title “engineer” through the use of a industrial exemption.  This means that if I work in industry providing engineering services, I’m exempt from getting licensed.  This exemption is pissing P. Eng’s off left and right.  Why, might you ask?  Because civil, mechnical, and electrical engineers are using it to get past taking the tests.  The IEEE is having kittens because they think anyone involved in engineering services that directly impact public safety should be required to be licensed before they use the term.  I can see that insofar as it impacts the safety of other people.  But yelling at lowly computer nerds because they claim to be “engineers”?  Tilting at windmills, in my opinion.  And heaven help you if you claim to be an engineer in Canada without a license.  I think they dispatch the Mounties to shoot you in the street like a common horse thief.

You wanna complain about me using the title “network engineer”.  Okay, let’s switch spots for a week.  I’ll spend all day staring at blueprints trying to figure out which way the road is supposed to go.  You can head back to my desk and keep the network running and figure out why the boss’s e-mail isn’t lightning fast.  You can unclog the tubes and carry my pager to respond to network outages at 3:30 in the morning on a Sunday.  You can put up with me calling you asking why I can’t get to Youtube today to watch some cat playing the drums.  And if you don’t run screaming back to me within a day loudly proclaiming that I am truly an engineer, I promise I’ll start calling myself something totally different.  Like Network Rock Star.  Since nobody needs any talent to be one of those.

Sending Calls Directly to Voice Mail

The number one feature request I get when I setup a new CallManager system is for direct voice mail transfers.  But you might say, “That’s easy.  Just put the iDivert softkey on the softkey template.” Oh ho, not so fast.  This request is for people to transfer a caller directly to someone else’s voice mail.  It seems that I either deal with some very polite customers that don’t want to interrupt the other person with a phone call or don’t want to the caller to wait the four or so rings before voicemail picks up.  Either that, or direct voice mail transfers are great ways to get rid of pushy salespeople.

At any rate, this is a feature that should probably have been baked into CallManager by now but hasn’t been for some reason.  Don’t ask me why.  But should you ever find the need to set it up for yourself, here’s how you do it:

1.  Figure out a transfer pattern. It goes without saying that  you should figure out what pattern you are going to use to allow calls to do direct voice mail transfer.  Some people are huge fans of using the pound/hash/octothorpe key.  Since I hate explaining exactly what an “octothorpe” is to people, I tend to favor the star/asterisk key.  Mainly because I like saying “asterisk”  You could also use a combination of the octothorpe and asterisk and one or more numbers.  The important thing is that you need to make sure it doesn’t collide something in your current dial plan.

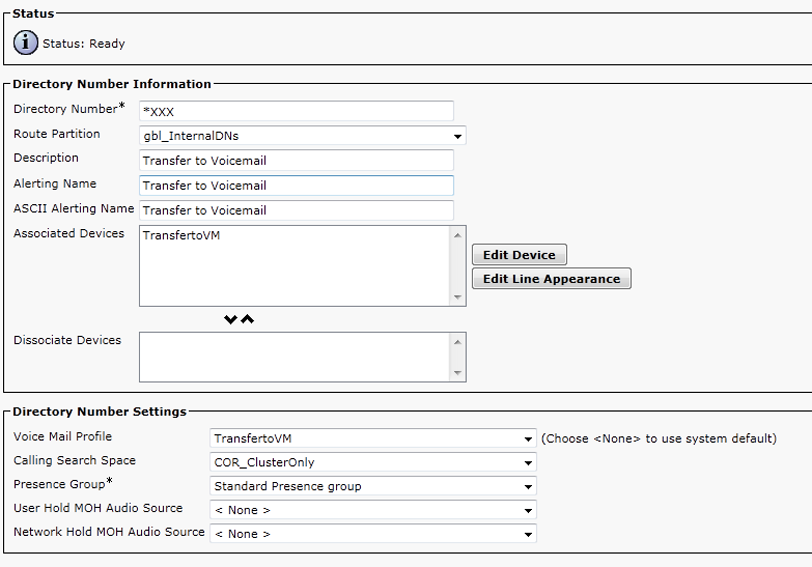
2. Configure the Voice mail Profile.  Ah, the meat of things.  In order to send a call straight to voice mail, you need a new voice mail profile.  Name it something that will make you remember what it does, like “TransferToVM” (my personal favorite).  Just don’t put the word ‘voice mail’ in it.  Unity seems to like to do really screwy things when the name includes the word ‘voice mail’.  Make sure the TransferToVM profile points at your current Voice mail Hunt Pilot.  Also, the voice mail mask needs to match your current extension length.  In my example below, the extension length is 3 digits, so the voice mail mask is “XXX”.

3. Create a CTI Route Point. CTI route points are like the tunnels of the voice world.  They are used to fix a multitude of issues in a pinch.  In this case, we need a device that is going to answer the phone rain or shine, and a CTI route point fits the bill.  I name mine the same as the voice mail profile just to keep everything straight.  Just be sure that it’s in a calling search space that can call your Unity/Unity Connection server.  And mind the naming conventions for CTI route points (they’re kind of picky).

4. Assign a Directory Number. Once you click ‘Save’ on the CTI route point, it’s going to allow you to assign a directory number.  This needs to be a combination of your voicemail transfer access code (from step #1) and your voice mail box mask (from step #2).  Make sure that it is contained in a partition that is dialable from your internal phones.  The important things to note here are that the voice mail profile for the CTI DN needs to be the profile created above (TransferToVM in this case).  Also, the Forward All settings need to be checked to send the call directly to voice mail when dialed.

And there you have it.  If you followed my example above, whenever you want to send a caller directly to Johnny’s voice mail at extension 101, you just need to dial *101.  Works like a charm.